Why Is My Solar Inverter Failing? Common Problems and How to Fix Them
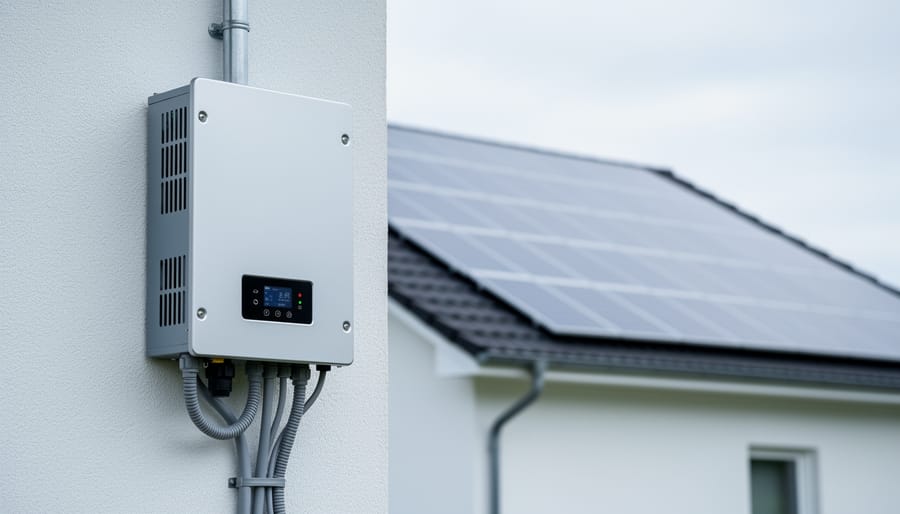
Most solar inverter failures stem from capacitor degradation, a fix that costs between $200 and $500 when caught early but can spiral into full replacement ($1,500 to $3,000) if ignored. The fastest diagnostic: check your inverter’s display or monitoring app for error codes, then verify all circuit breakers and DC disconnect switches are fully engaged. These two steps resolve roughly 40% of reported inverter problems without requiring a technician.
Understanding when to repair versus replace hinges on context. String inverters typically last 10 to 15 years, microinverters stretch to 20-25 years, yet both experience predictable failure modes tied to thermal stress, grid voltage fluctuations, and component wear. While solar panel lifespan extends 25 to 30 years, inverters remain the weakest link in photovoltaic systems.
This guide walks through symptom identification (no display, error codes, reduced output), root causes (environmental factors, electrical issues, firmware bugs), and step-by-step troubleshooting from simple resets to component testing. You’ll learn which problems demand immediate professional attention (smoking, burning smells, exposed wiring) and which you can safely diagnose yourself. Proper maintenance extends useful life by 20-30%, but knowing the breakpoint between economical repair and strategic replacement protects your investment better than blind faith in fixes.
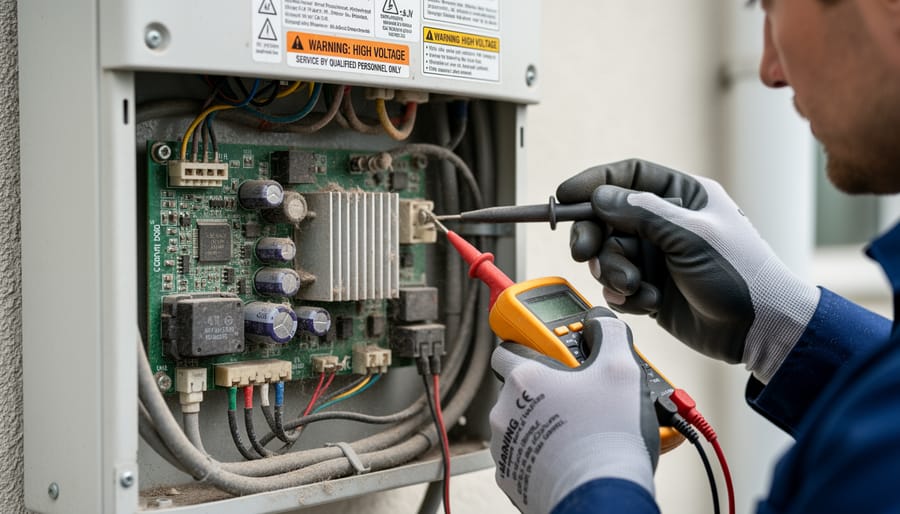
Safety first: always disconnect both AC and DC power before inspecting any inverter components. Grid-tied systems carry lethal voltage even when panels aren’t producing power.
Recognizing Solar Inverter Problems: Key Warning Signs
Solar inverter problems rarely appear without warning. Most failures announce themselves through specific symptoms that, when caught early, can prevent expensive downtime and extend your system’s operational life. Learning to recognize these warning signs helps you distinguish between a quick reset and a component reaching the end of its serviceable life.
Your inverter communicates its health status through several channels, and monitoring all of them gives you the complete picture. The display screen or monitoring app typically shows the first indication something’s wrong, but physical symptoms often provide equally important clues. Pay attention to changes in your system’s normal operation, especially if multiple symptoms appear together.
- Error codes or fault messages on the display screen or monitoring app
- Red or flashing warning lights instead of the normal green status indicator
- Significant drops in power output compared to similar weather conditions
- Frequent shutdowns or inability to restart in the morning
- Loud humming, buzzing, or clicking sounds from the unit
- Excessive heat on the inverter casing or burning smells
- Fan running constantly or not running when it should
- Communication loss between inverter and monitoring system
The severity of these symptoms varies considerably. A single error code that clears after a reset usually indicates a temporary grid disturbance rather than hardware failure. By contrast, repeated shutdowns combined with overheating point to thermal stress that’s actively shortening your inverter’s lifespan. Performance drops exceeding 10-15% without corresponding weather changes suggest component degradation that won’t resolve on its own.
Physical symptoms like unusual sounds or excessive heat demand immediate attention. A failing fan or blocked ventilation forces internal components to operate above their design temperature, accelerating capacitor degradation and potentially cutting years off your inverter’s expected lifespan. These aren’t minor glitches you can ignore.
What Causes Solar Inverters to Fail?
Capacitor Degradation
Electrolytic capacitors represent the Achilles’ heel of most solar inverters. These components smooth voltage fluctuations and filter electrical noise, but they’re inherently vulnerable to degradation. Under typical operating conditions, electrolytic capacitors fail after roughly 5-10 years, making them the primary reason inverters need replacement before their other electronics wear out.
Heat is the silent killer. Every 10°C rise in operating temperature roughly halves capacitor lifespan. An inverter running at 65°C might see capacitor failure in 5 years, while one at 45°C could stretch to 15 years with the same components. The electrolyte inside gradually evaporates, increasing internal resistance and reducing capacitance until the capacitor can no longer perform its function.
You’ll recognize capacitor failure through tell-tale symptoms: the inverter randomly shuts down during peak production, fails to start in the morning, or displays overvoltage errors. Bulging or leaking capacitors visible on the circuit board confirm the diagnosis. While replacement is technically possible, labor costs often make full inverter replacement more economical, especially for units approaching 7-8 years of service.
Thermal Stress and Cooling System Failure
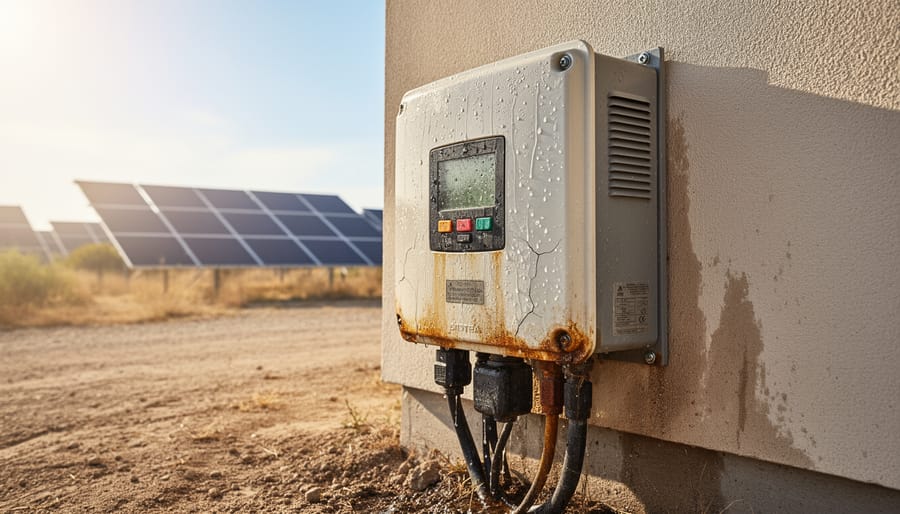
Heat is the silent killer of solar inverters. Most inverters operate efficiently between 25-40°C, but internal temperatures can soar to 60-80°C when cooling systems fail or ventilation is inadequate. This thermal stress accelerates component degradation, particularly in capacitors and semiconductor junctions, cutting expected lifespan from 15 years down to 8-10 years in severe cases.
Poor ventilation ranks as the most preventable cause. Inverters installed in enclosed spaces, against walls, or in direct sunlight trap heat that has nowhere to dissipate. The problem compounds in hot climates where ambient temperatures already push operational limits. When internal fans fail, a common occurrence after 5-7 years of continuous operation, temperatures spike rapidly, triggering protective shutdowns.
Extreme climates present a double challenge. Desert installations face daytime heat exceeding 45°C, while coastal areas battle humidity that corrodes fan motors and clogs filters with salt residue. Even in moderate climates, attics and garages can create microenvironments where summer temperatures routinely exceed manufacturer specifications.
The inverter responds to overheating by derating output or shutting down completely, protecting itself but reducing your system’s energy production. Repeated thermal cycling, heating up, shutting down, cooling, restarting, stresses solder joints and circuit boards, creating intermittent failures that worsen over time until permanent damage occurs.
Grid and Voltage Issues
Solar inverters constantly synchronize with the grid, making them vulnerable to electrical instability. Voltage fluctuations outside the inverter’s operating range (typically 180-260V for residential systems) trigger protective shutdowns. Repeated overvoltage events, common in areas with high solar penetration and weak grid infrastructure, stress DC capacitors and switching components, accelerating wear. Frequency variations beyond ±1 Hz from the standard 50 or 60 Hz cause similar protective responses.
Grid voltage rise during midday peak production forces inverters to curtail output or disconnect entirely, creating thermal cycling that degrades solder joints and capacitors. Utility-side issues like transformer tap settings, phase imbalances, or aging infrastructure compound these problems. Inverters in rural areas with long distribution lines face greater voltage swings. Installing voltage monitoring equipment helps identify whether problems originate from the grid or the inverter itself, preventing unnecessary replacements when the root cause lies with utility supply quality.
How to Fix Common Solar Inverter Problems
Resetting Error Codes and System Faults
Most solar inverter error codes resolve with a simple reset, saving you from unnecessary service calls. Understanding when a fault is temporary versus a sign of underlying hardware failure helps you make quick, informed decisions.
Error codes typically fall into three categories: temporary grid issues (E001-E003 on most systems), communication faults (E010-E015), and serious hardware failures (E100+). Check your inverter’s manual or the manufacturer’s website for specific code definitions, as numbering varies by brand. Codes that appear once and clear often reflect momentary grid fluctuations or sensor glitches rather than component degradation.
Before attempting any reset, photograph the error message and note the time it appeared. This documentation proves valuable if the problem recurs. Verify that solar production conditions are normal, clouds passing overhead or recent weather events can trigger protective shutdowns that mimic faults.
- Turn off the DC isolator switch near your solar panels first, then switch off the AC isolator on the inverter itself. Wait 60 seconds for capacitors to fully discharge.
- Power the inverter back on by flipping the AC isolator, waiting 30 seconds, then activating the DC isolator. The unit should run through its startup sequence, typically taking 2-5 minutes to reconnect to the grid.
- Monitor the display for 10 minutes after restart. If the same error code reappears within this window, the fault likely stems from a persistent issue requiring professional diagnosis.
- For communication errors, check WiFi or Ethernet connections, restart your monitoring gateway if applicable, and verify that cables haven’t been disturbed by animals or weather.
- Document any error that returns more than twice in 24 hours. Recurring codes, even after successful resets, indicate accelerating component wear that warrants inspection before complete failure occurs.
Some manufacturers require holding specific button combinations for hard resets that clear all stored faults. Consult your model’s technical guide before attempting these deeper resets, as they can erase performance data you might need for warranty claims. String inverters older than eight years that need frequent resets often have failing capacitors or control boards, making replacement more economical than repeated service visits.
Addressing Overheating and Ventilation Issues
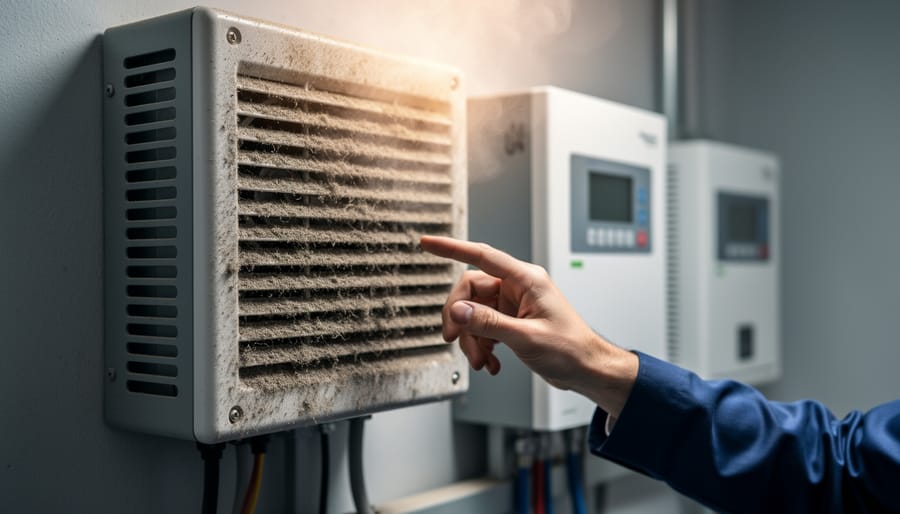
Overheating is one of the most common causes of reduced inverter lifespan and performance degradation. When an inverter consistently runs too hot, internal components, especially capacitors, fail faster, potentially cutting operational life in half. Start by checking the inverter’s temperature display or monitoring app during peak production hours; most models show a thermal warning between 60-70°C.
Follow these steps to diagnose and resolve cooling issues:
- Check the ambient temperature around the inverter. If it’s installed in direct sunlight, an unventilated garage, or near heat sources, the environment itself may be the problem.
- Inspect all air vents for dust, debris, or insect nests. Use compressed air or a soft brush to clear intake and exhaust openings, never use water or cleaning liquids.
- Listen for fan operation during active production. If you hear grinding, rattling, or no sound at all when the inverter should be cooling, the fan likely needs replacement.
- Verify clearance around the unit. Manufacturers typically require 30-50cm of space on all ventilated sides; remove any stored items, cardboard boxes, or clutter blocking airflow.
- Monitor temperatures after cleaning. If they remain elevated above manufacturer specs, consider adding external ventilation or relocating the unit.
For inverters in extremely hot climates or poorly ventilated spaces, relocation often proves more cost-effective than repeated repairs. Moving the inverter to a shaded exterior wall with good airflow can add years to its operational life. If relocation isn’t feasible, installing a supplemental cooling fan or upgrading to a model with higher temperature ratings may be necessary for systems expected to run another five to ten years.
Fixing Communication and Display Errors
Most communication and display errors stem from loose connections or network configuration issues rather than hardware failure. Start by power-cycling the inverter: switch off the DC isolator, wait 30 seconds, then restore power. This clears temporary software glitches affecting monitoring systems.
For WiFi disconnections, verify your router signal strength at the inverter location using your phone. If weak, install a WiFi extender or hardwire an ethernet connection. Check the inverter’s network settings through its display menu, incorrect IP addresses or outdated firmware often cause dropout patterns. Update firmware through the manufacturer’s app if available.
Inspect all communication cables between the inverter and monitoring equipment. Corroded or partially-seated RS485 connectors frequently disrupt data transmission without affecting power conversion. Clean contacts with electrical cleaner and reseat firmly.
Display malfunctions require different assessment. A blank screen with normal power output suggests a failed LCD panel, a minor repair. However, error messages combined with production drops indicate internal board failures requiring professional diagnosis. Document all error codes and performance data before contacting your installer, as intermittent communication faults complicate troubleshooting when they clear between service visits.
When Component Replacement Is Necessary
Component replacement becomes necessary when troubleshooting reveals failed hardware rather than temporary faults. Capacitors showing bulging, leaking, or measured capacitance below 80% of rated value need replacement, typically costing $200-400 for parts and labor. Since capacitors often fail around year 7-10, replacement makes financial sense if the inverter is otherwise healthy and under 12 years old.
Failed cooling fans create a catch-22: the $50-150 repair extends life, but persistent overheating may have already damaged other components. Request a thermal inspection before authorizing fan replacement on units older than 8 years.
Circuit board failures present the toughest decision. Replacement boards cost 40-60% of a new inverter’s price, and availability drops sharply after manufacturers discontinue models (usually 5-7 years post-launch). If your inverter has reached 75% of its expected lifespan and needs a circuit board, replacement rarely makes economic sense.
Calculate the cost-per-remaining-year: divide repair cost by years of likely additional service. When this exceeds $300 per year, or when the inverter needs a second major repair within 24 months, full replacement offers better value and restores warranty protection.
Understanding Inverter Lifespan and Failure Patterns
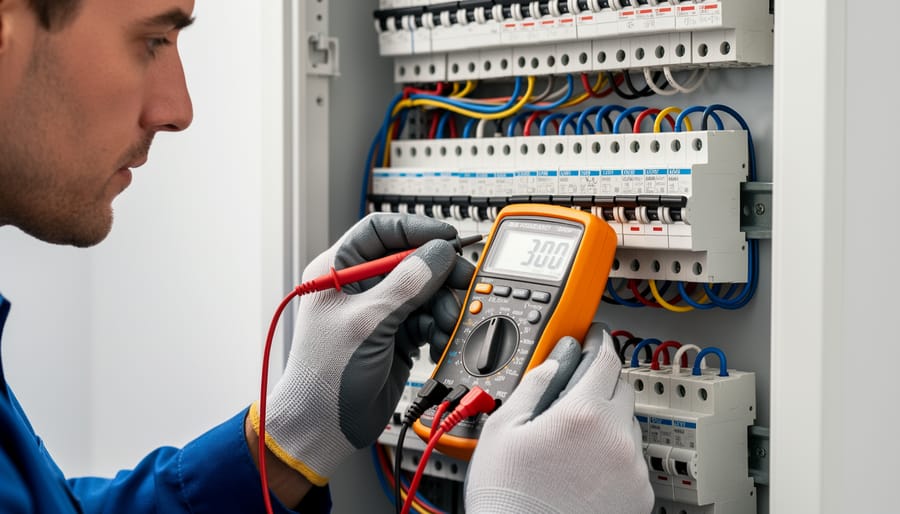
Understanding how solar inverters age helps you anticipate when problems shift from repairable nuisances to signals that replacement makes more sense. Unlike how solar panels age gradually declining over 25-30 years, inverters follow a more abrupt trajectory with component wear concentrated in specific parts.
String inverters typically last 10-15 years, while microinverters often reach 20-25 years thanks to their distributed design and lower per-unit thermal stress. This difference stems from how heat cycles affect electrolytic capacitors: a single string inverter processes the full array’s power, generating concentrated heat that degrades capacitors faster than the dispersed load across multiple microinverters. Central inverters in commercial installations may show even shorter lifespans of 8-12 years under constant high-power operation.
Most inverter failures follow the bathtub curve pattern observed across electronics. Early failures (first 1-2 years) result from manufacturing defects, faulty solder joints, defective components, which is why infant mortality rates cluster here and warranties catch most issues. The long flat middle period shows minimal random failures as quality units perform reliably. Then, as inverters approach 10 years, the curve rises steeply as wear-out mechanisms dominate: capacitors dry out, cooling fans seize, and circuit boards develop micro-cracks from thermal cycling.
- MTBF (Mean Time Between Failures)
- The average expected operational time before a component fails, typically 100,000-200,000 hours for quality inverters. This statistical measure helps compare reliability across brands but doesn’t predict individual unit lifespan.
- Warranty Period
- The manufacturer-guaranteed operational timeframe, usually 5-12 years for string inverters and 10-25 years for microinverters. Warranty length often signals manufacturer confidence in longevity.
- Degradation Rate
- The annual decline in inverter efficiency, typically 0.2-0.5% per year until a failure event occurs. Unlike panels, inverters don’t degrade gradually, they work at full capacity until a component fails.
- Infant Mortality
- Early-life failures occurring within the first 1-2 years due to manufacturing defects rather than wear. Accounts for 3-5% of units in field studies.
- End-of-Life Indicators
- Recurring shutdowns, frequent error codes, efficiency drops above 5%, or repair costs exceeding 50% of replacement value. These signal the unit has entered the steep portion of the bathtub curve.
Field studies show that inverters in consistently hot climates (above 35°C ambient) fail 30-40% earlier than identical units in moderate conditions. Proper ventilation, surge protection, and installation away from direct sun exposure can extend even budget inverters to the upper end of their expected range, while poor placement shortens premium units.
Preventing Premature Inverter Failure
Most inverter problems are preventable with proper installation and consistent care. Field studies show that inverters in well-ventilated, shaded locations last 30-40% longer than units exposed to direct sun and poor airflow, making site selection the single most impactful prevention measure.
Strategic Installation Placement
Install inverters in shaded areas where ambient temperature stays below 25°C whenever possible. Direct sunlight and heat are the primary accelerators of capacitor degradation and thermal stress. Wall-mounted inverters should face away from afternoon sun, while ground-mounted units benefit from overhead shade structures. Ensure at least 30cm clearance on all sides for air circulation, cramped spaces trap heat and drastically reduce component lifespan.
Indoor installations in garages or utility rooms offer superior temperature control compared to outdoor enclosures. If outdoor mounting is unavoidable, choose NEMA-rated weatherproof enclosures and verify that ambient temperature ratings match your climate. Coastal installations require additional corrosion protection and sealed ventilation systems to prevent salt air intrusion.
Maintenance Schedule Essentials
Regular maintenance extends operational life by catching small problems before they cascade into failures:
- Clean air vents and filters quarterly in dusty environments, biannually in clean locations
- Inspect for insect nests, rodent damage, and debris accumulation every six months
- Verify fan operation and listen for unusual bearing noise during seasonal checks
- Check all electrical connections for tightness and corrosion annually
- Review monitoring data weekly for performance deviations or error patterns
Document each inspection with photos and performance readings to track degradation trends over time. A maintenance log helps identify when repairs are needed and provides warranty claim evidence.
Electrical Protection Systems
Surge protectors on both AC and DC sides prevent voltage spikes from grid fluctuations and lightning strikes. Type 2 SPDs rated for solar applications cost £100-200 but can prevent thousands in inverter damage. Proper earthing is equally critical, verify ground resistance stays below 10 ohms and inspect earth connections during annual maintenance, as this protects against both electrical faults and static buildup from panel wear and tear.
Monitoring Best Practices
Enable all available monitoring alerts including temperature warnings, production drops, and error notifications. Set thresholds at 10% below expected performance rather than waiting for complete failure. Remote monitoring catches developing problems weeks before they cause shutdowns, allowing scheduled maintenance instead of emergency repairs.
Frequently Asked Questions About Solar Inverter Problems
How long should a solar inverter last before problems become unavoidable?
String inverters typically last 10-15 years with proper care, while microinverters often reach 20-25 years. Regular maintenance for longevity and addressing minor issues promptly can help your unit reach or exceed these benchmarks.
When is repairing an inverter worth the cost versus replacing it entirely?
If your inverter is under five years old and the repair costs less than 40% of a new unit’s price, repair usually makes sense. Beyond ten years, replacement often proves more economical since you’re buying a warranty period and avoiding repeated failures.
Will my warranty cover inverter problems and how do I know?
Most manufacturers offer 5-10 year standard warranties, with extended coverage available for purchase. Check your warranty documentation for specific exclusions, damage from improper installation, environmental factors, or lack of maintenance typically aren’t covered.
Can I upgrade to a different inverter brand when my current one fails?
Yes, you can switch brands during replacement, but verify the new inverter matches your system’s voltage, power rating, and panel configuration. Your installer should confirm compatibility with your existing panels and electrical setup before swapping units.
These questions reflect the real concerns system owners face when inverter problems emerge. The repair-versus-replace decision hinges on age, repair cost as a percentage of replacement, and whether you’re dealing with a symptom of broader degradation. A three-year-old inverter throwing error codes deserves troubleshooting and component replacement; a twelve-year-old unit with the same symptoms likely signals end-of-life, especially if capacitor degradation or thermal stress has taken hold. Warranty terms matter, read the fine print to understand what’s excluded and whether professional installation was required to validate coverage. When upgrading aging systems, modern inverters often bring better efficiency and monitoring capabilities, but the electrical fundamentals must align with your existing array.
Understanding solar inverter problems and addressing them promptly can mean the difference between a system that barely reaches 10 years and one that operates reliably for 15 years or more, matching your expected system lifetime. Most inverter failures aren’t sudden catastrophes but gradual degradations you can catch early through monitoring and inspection.
The repair-versus-replace decision hinges on age and cost. If your inverter is under five years old and the fix costs less than 30% of replacement, repair makes sense. Beyond ten years, especially when facing major component failures, replacement often delivers better long-term value and improved efficiency.
Regular maintenance, cleaning vents quarterly, checking connections annually, monitoring performance daily, prevents 60-70% of premature failures. Combined with proper installation in shaded, well-ventilated locations, these practices consistently push inverters past their rated lifespan.
When problems arise, diagnose them systematically rather than ignoring warning signs. The inverters that reach 15+ years aren’t necessarily superior products; they’re well-maintained units whose owners caught small issues before they cascaded into expensive failures.